Linux Sound Studio
Posted on aroundtheglobe.biz in 2017, migrated contents in 2021 (and updated some links)
Did not check if each command still worked - but process should have remained similar!
Linux Sound Studio
Posted on aroundtheglobe.biz in 2017, migrated contents in 2021 (and updated some links)
Did not check if each command still worked - but process should have remained similar!
Introduction
As I recently reinstalled my new computer, I had the chance to reinstall (and improve) my audio studio.
It was a bit more complex from what I remembered (probably cause I did in 2 days, I what last time took me over 3 years), but after a few hundreds of posts and forums read, it’s all working great again. Anyway, I decided to regroup the software I use and some interesting links on this page.
Some software parts will be mentioned in the hardware part, it might be usefull to read this guide twice!
Anyway, here’s how I setup my sound studio with Linux (I use Gentoo/X86_64).DISCLAIMER: I’m not working in IT nor in music, these are hobbies, I’m not affiliated to any product or vendor that might be listed on this page, just posting my used experience about those. This guide is not guaranteed to work, it is what happens to work for me and is provided as-is, with no guarantees whatsoever.
0. Is it worth the effort for you?
Before we start delving into understanding and installing the required components, it might be interesting to consider whether it is the right solution for you. Indeed, installing a studio by hand like I did might require to get your hands dirty. The quickest way to get recording with Linux would definitely be to install a dedicated studio distro, like Ubuntu Studio, KXStudio or AVLinux, but on the one hand, I wanted the studio to be available in my everyday’s distro (gentoo), and on the other hand, I like to have “tailor made”, optimised applications.
1. Jack
Jack is probably the most central piece of a Linux Studio, seriously… no Jack no fun!!! For a complete definition, check Google – in a simplistic view, “Jack is a real time sound server, allowing to connect various instruments, programs, effects, …” I encourage you to read Demystifying JACK – A Beginners Guide to Getting Started with JACK from LibreMusicProduction.com (this article is partly redundant of that one).
In this setup, I use 3 sound cards:2. Hardware (1)
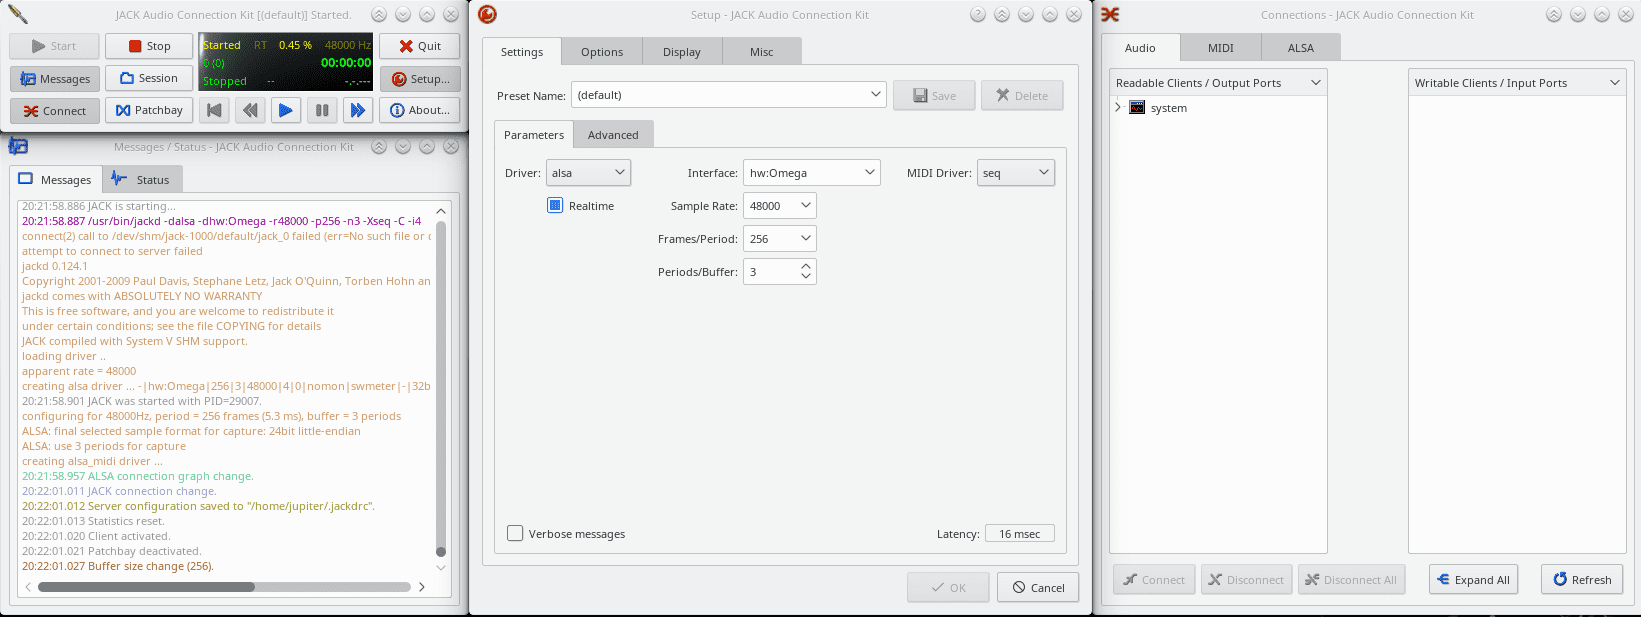
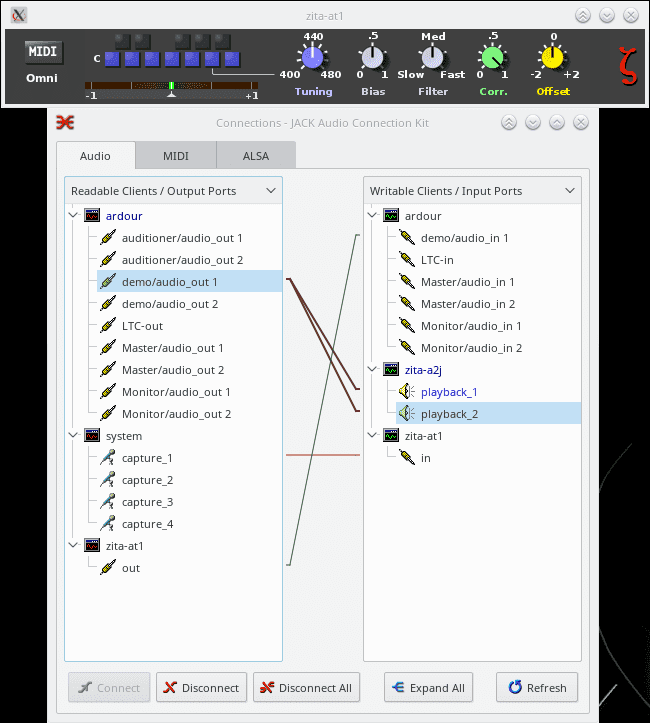
In the setup box, I’ve chosen the Omega interface, check real-time, sample rate, MIDI Driver frames/period and periods/buffer (depend on your interface) – In the advanced tab, i’ve selected capture only (not shown on screenshot).
You then click start, and if everything worked well, jack is now running, the system part you can see in readable clients represents the inputs of the omega.
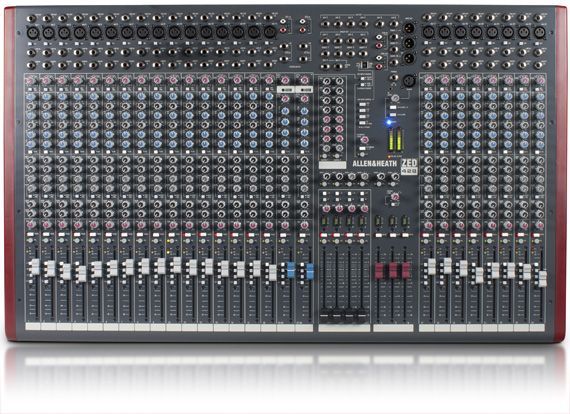
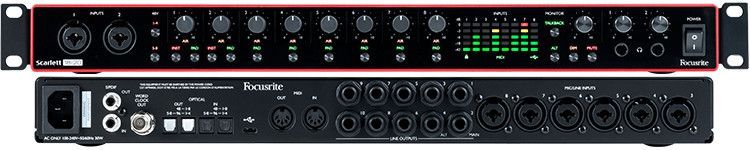
Update: As I play in two places, I moved the lexicon to the secondary place and now also have a setup based on Allen & Heath mixtable + focusrite soundcard. More cables, similar setup on the computer but higher definition recordings and more tracks at once - (I wont go much over the details of this setup)!
Update: I have had mixed results depending on the hardware used: when recording 8 tracks at the same time with the focusrite, while my destop dual xeon machine had no issues, an i5 showed some lags and unstability with realtime kernel.
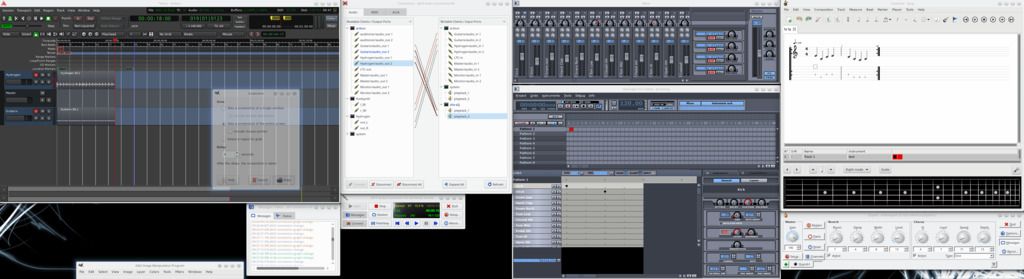
3. Software
This list is far from exhaustive, but it is the small set of tools that makes me comfortable in my musical creation. I will try to drive you through the basic configuration of each software, but keep in mind that I will barely scratch the surface!!!
qjackctl is the app I use as an "easy" interface to Jack. I will not delve into all the details now - as qjackctl will be mentioned all around
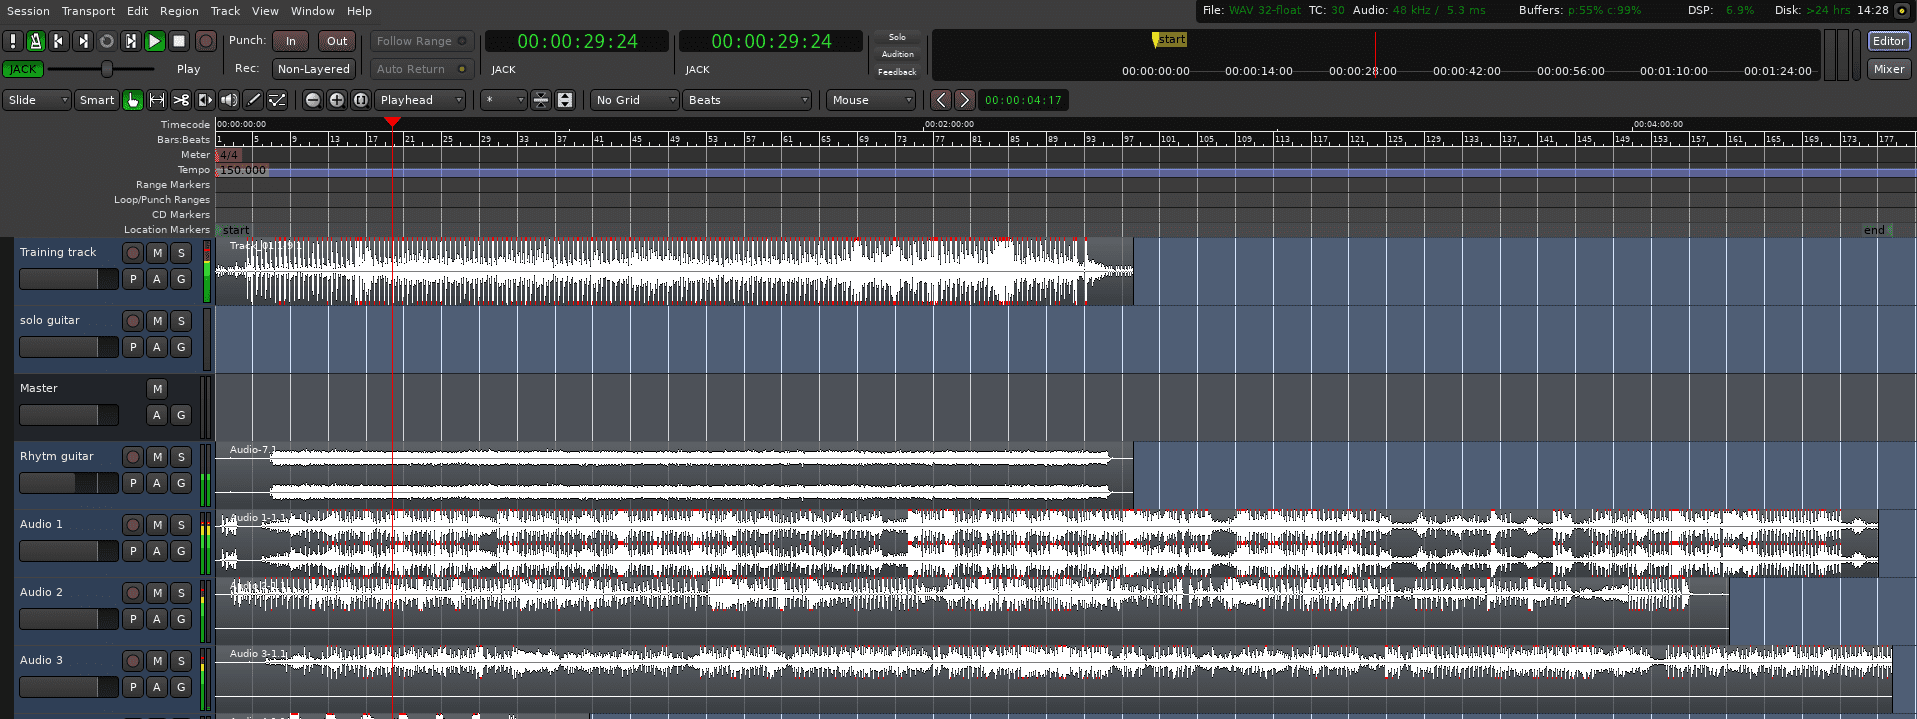
Ardour is a Digital Audio Workstation, it’s interface seems complex at first sight, but we can go very far only scratching the surface
I use it for a few very specific tasks:

While it is nice to be able to record instruments one by one, and not really an issue when people are playing them, it becomes more of an issue of synchronizing instruments that are played by programs. This is where the Timemaster comes into play: it allows to sync the playing of all programs.

$ aplay -l 
$ zita-j2a -d hw:5 -j zita-a2j -r 48000 -p 256 -n 2 -c 2 -Q 48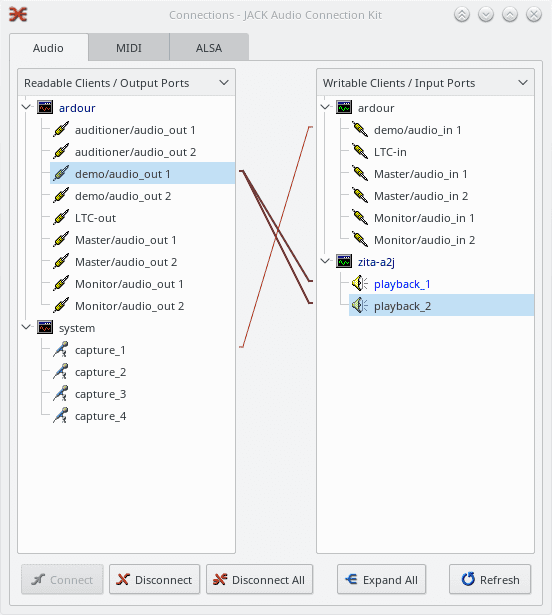
guitarix: Is a virtual guitar amplifier. Or that’s what they say… actually it’s a complete rack with thousands of effects and possibilities. Once installed, it is important that you add some presets to guitarix, in order to have more effects. (download the file, extract, and copy the .gx files to ~/.config/guitarix/banks/
Once banks are added, you can start guitarix and start playing with nice sounds (I particuliary like Darling’s JCM800)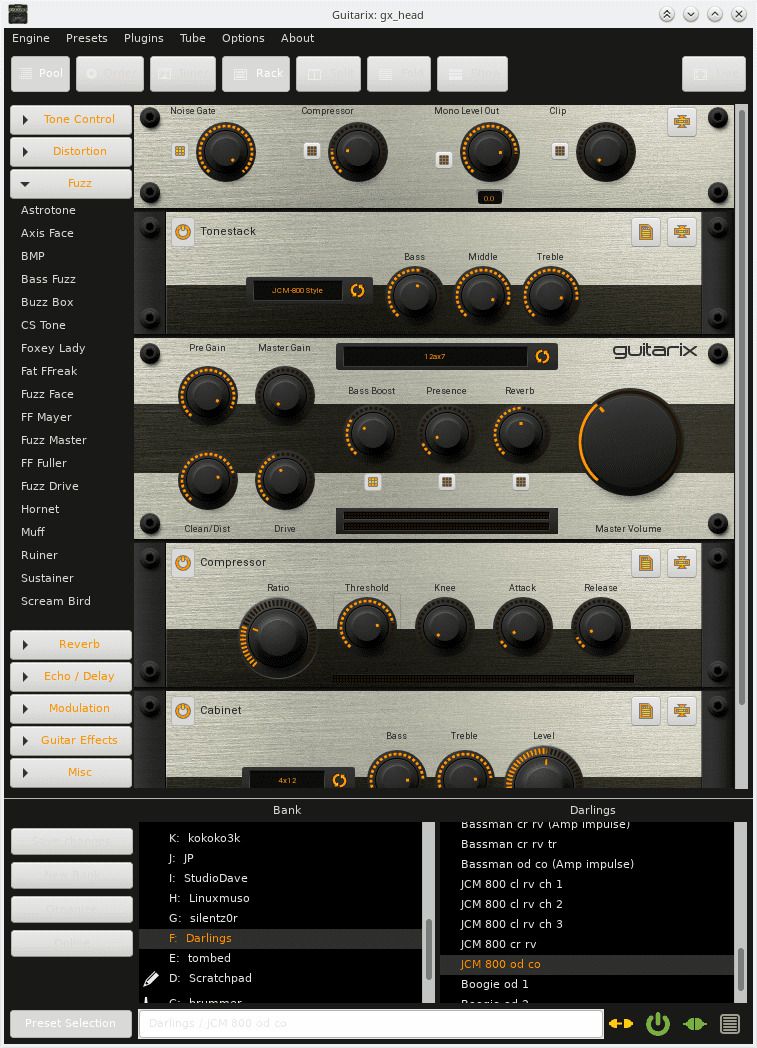
Purists will say that the JCM800 is not a real JCM800, and that is true, but purists also know that no 2 JCM800 sound exactly the same. The amazing thing here is the number of available sounds to make the one that you love.
But the killer feature of Guitarix VS a JCM800 is the ability to process a stream that has been recorded before. Stay with me on that one!
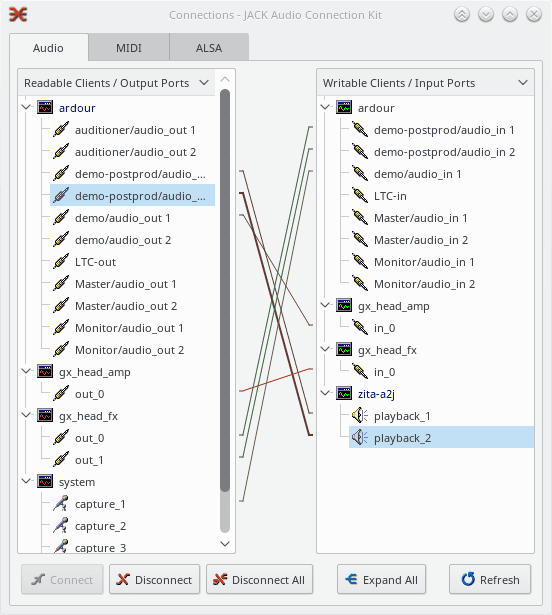
Here I connected the first demo track directly to the second for live recording. Of course, now we can just replay the first one through guitarix in order to rerecord the postprod track with different settings in the effects!
As we’ve juste seen, guitarix has space for more effects between the amp and the fx, this is where calf comes into play.
Calf has a mountain of effects, but on top of that, those effects have parameters that would make NASA engineers jealous!
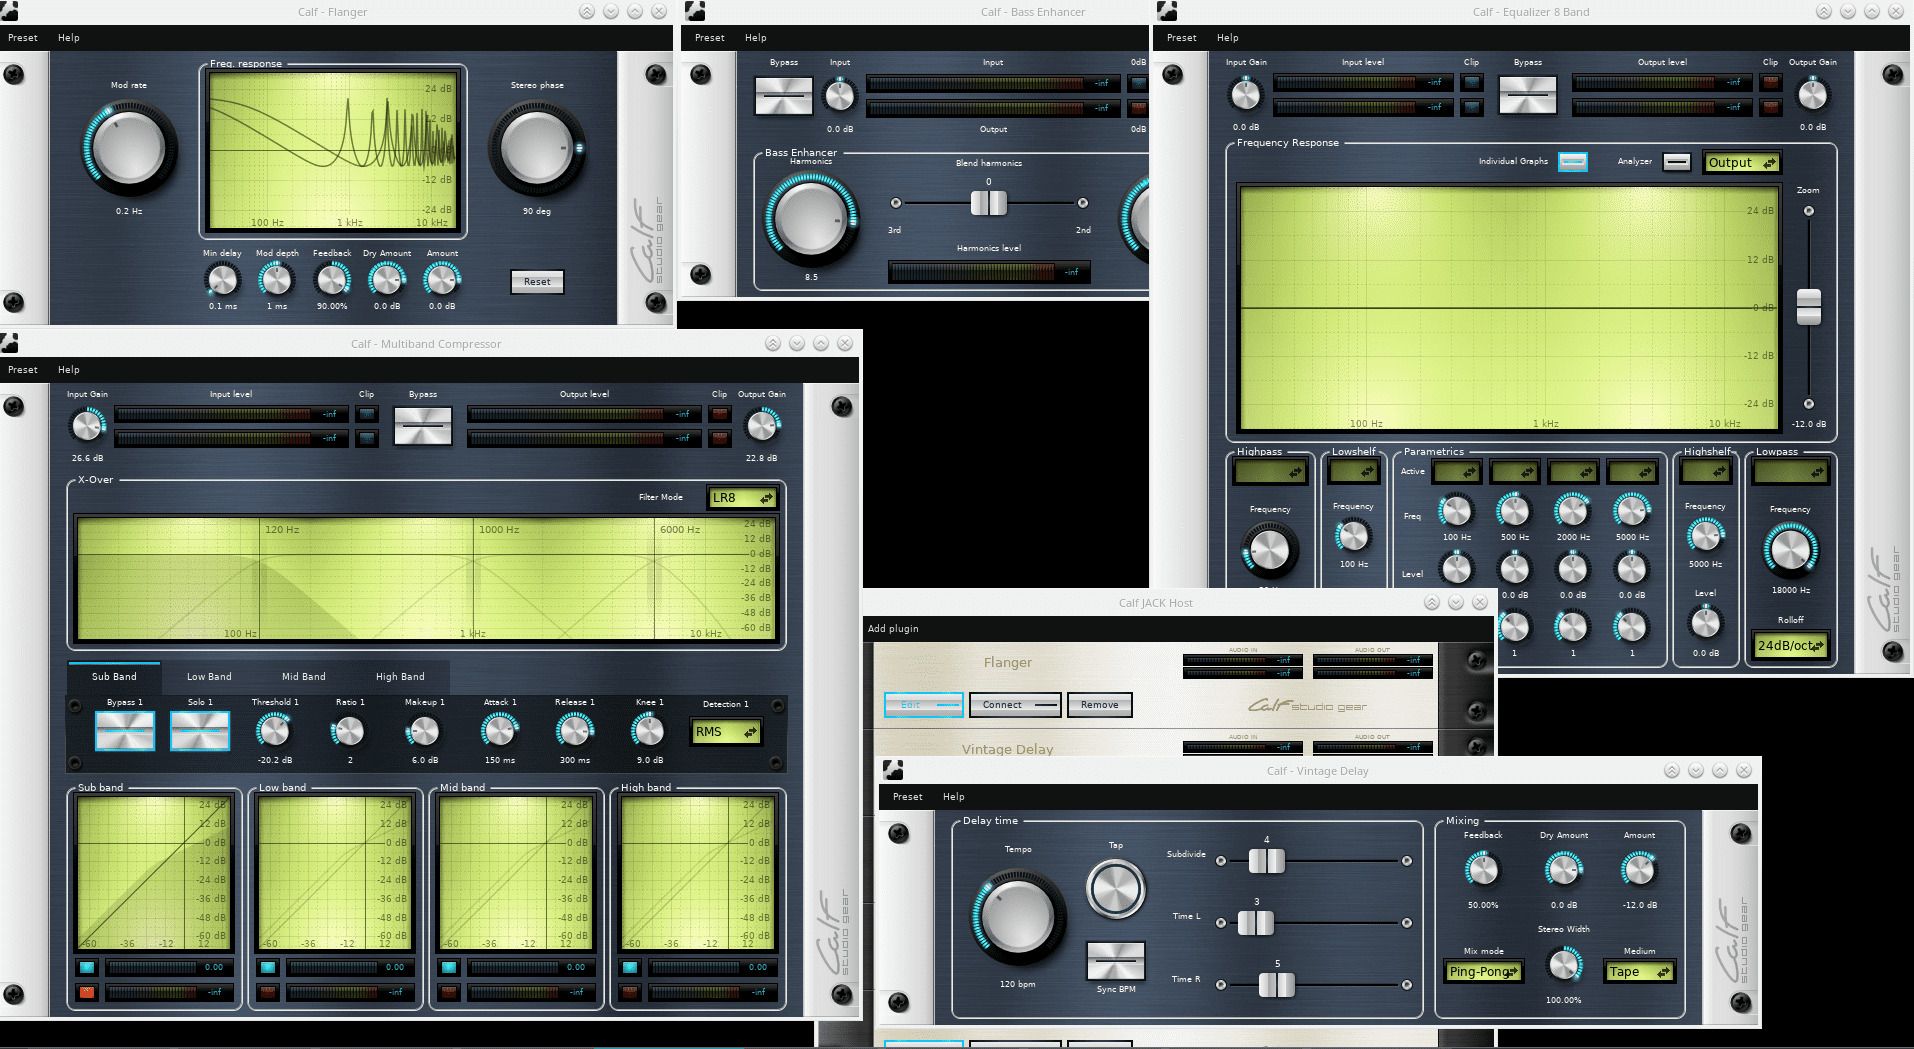
And here is also where we start seeing the limitations of qjackctl connection panel (in terms of clarity… imagine more instruments)
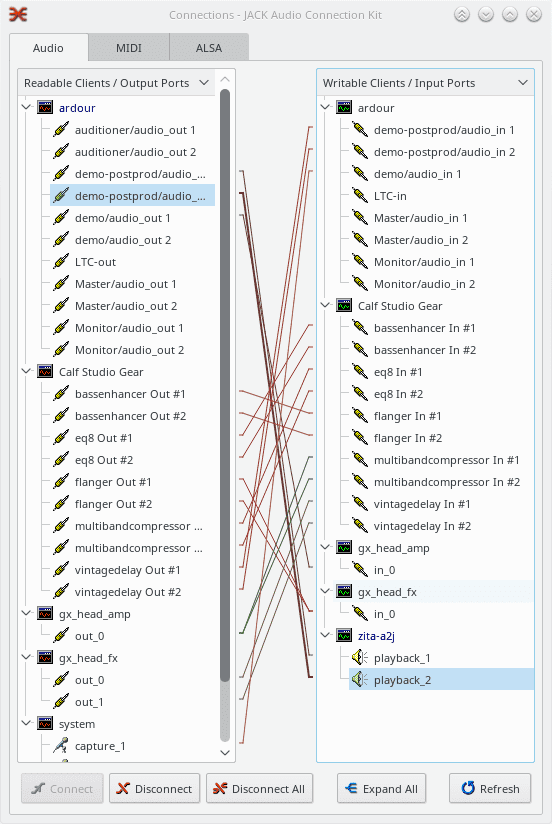
This overflow of clarity leads us to the next handy application:
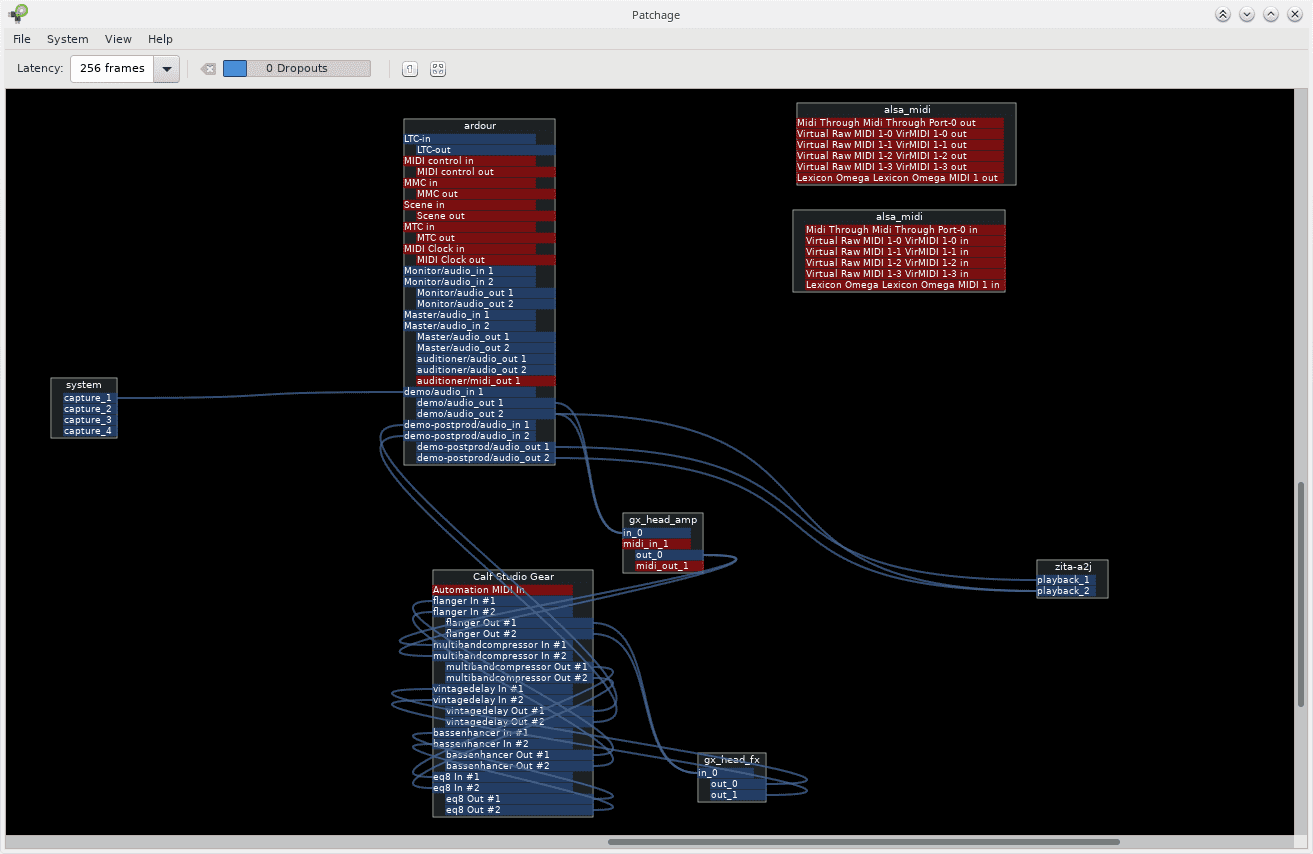
Tuxguitar is basically a guitar tablature editor, and that’s what I used it for… until I discovered it’s hidden superpowers! Indeed, while you can write the partition/tablature that you want with tuxguitar, but tuxguitar is able to play tabs to a MIDI synthetizer, all this of course, in sync with Jack.
To setup tuxguitar, click on tools->Settings->Sound, and set “Jack Sequencer” as the MIDI Sequencer, and MIDI THROUGH PORT as MIDI PORT. Now chose your instrument, and type your partition.
However, you will hear nothing until you get a synth running, leading us to:
4. Hardware(2)
This should be quite obvious by now if you went through the whole software sections.
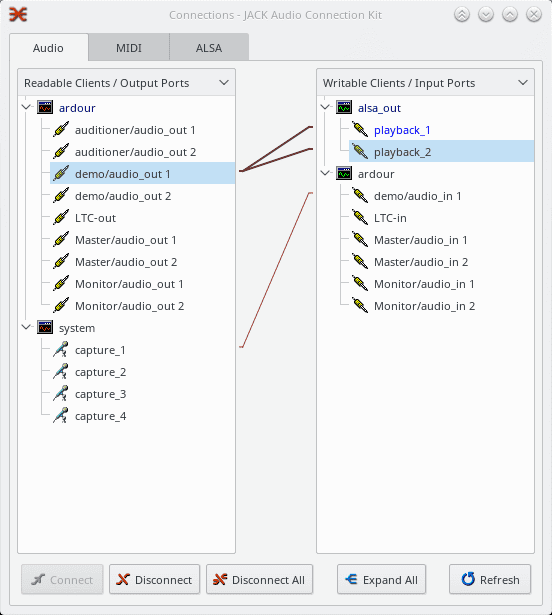
As you can guess, the instruments will be connected as inputs in qjackctl panel, where you will route them until they reach the track in ardour and/or the speakers.
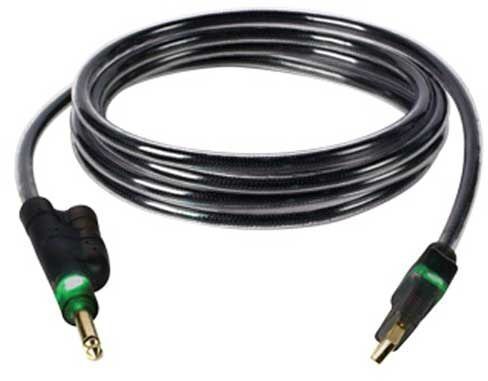
There is still one thing between our instrument and qjackctl, we will need to plug it into “some kind of soundcard”.
Soundcards have evolved quite a bit with the raise of “USB gadgets”, as always, this is far from exhaustive, but here’s my conclusion based on my current hardware.
Note that all interfaces presented have linux kernel support – no tertiary blobs required ;p
My internal sound card (ALC1150) works ok”ish”. I mean it works great, but there are some parasitic noises from time to time that seem to be driven by interference from my GPU(NVIDIA 1060, 6GB). I’m quite sure of the cause, as the hissing becomes unbearable when I execute GPU intensive tasks like training tensorflow. Hence I use this card for general pulse audio, where quality is not critical. Additionally, with this setup, I can still play sounds or music while working in ardour and Jack has a monopoly on my recording device.

Was my first try at recording guitar on my pc a long time ago.
Pros:quite affordable, nothing to configure on the device (only qjackctl).
Cons:Not the best sound, 16bit, nothing to configure on the device.
This device was quite interesting, until I realised that while the whole device works in 24 bits, the USB output is limited to 16 bit. So while I was thinking of using this as primary recording device, it got relegated to second row: multiplexing drums (more on that later).
Pros:Plenty of inputs, phantom power, nice parameters and effects for each track.
Cons:16 bit USB, lacked a bit of power when sending to a 400W amp.
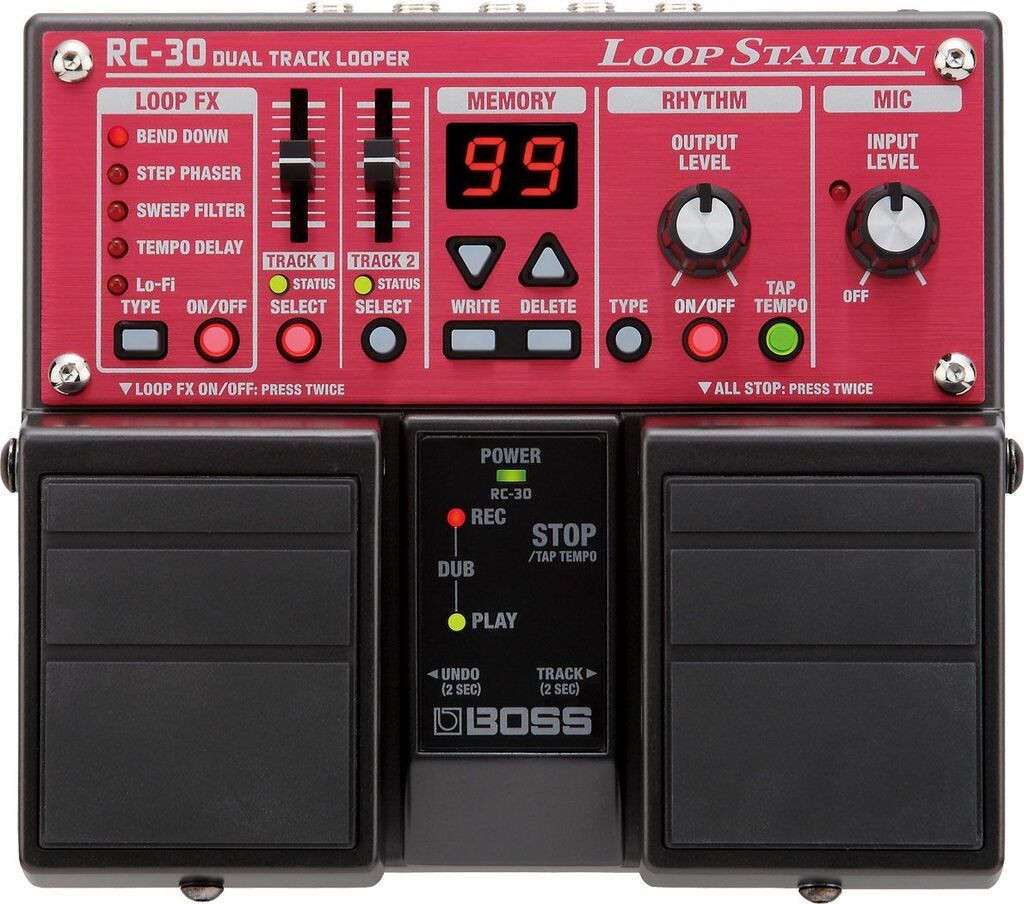
This one has a USB port, but I didn’t manage to get it working on linux so far :'(
Pros:Great pedal overall.
Cons:Expensive, not working as USB input for my linux studio.
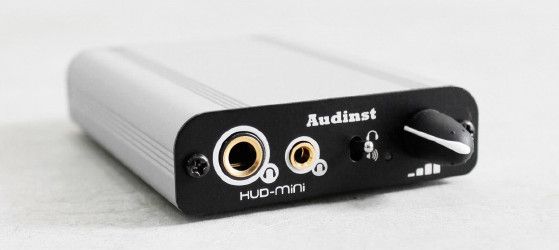
I use this one as main output on the computer - or mainly with zita-a2jbridge to listen while recording.
Pros:Great sound, I love the physical switch to toggle between speakers and headset.
Cons:Price maybe.
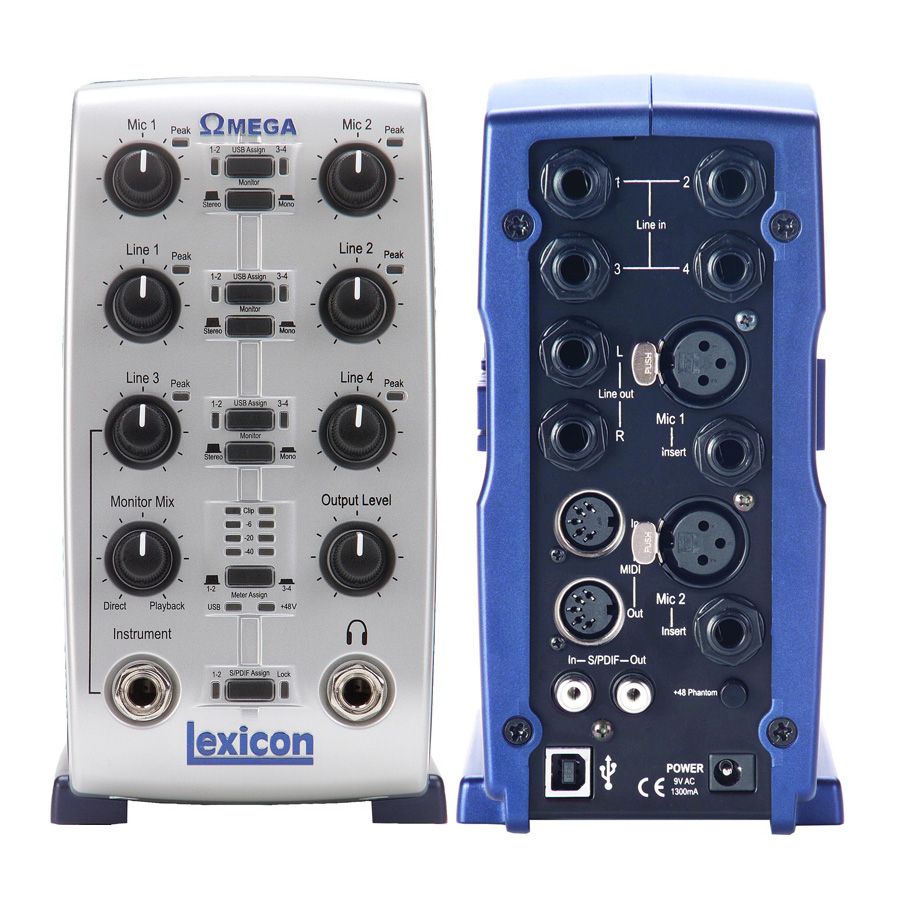
This one is at the end of commercial lifecycle, what a pity. I’m thinking of buying a spare one… love this device.
Pros: 24 bits 48khz, reasonable price, Good sound quality, awesome connectivity.
Cons: Only record 2 tracks at once.
This is a great soundboard, allowing me to mix levels and send to amp system while also sending lines to the soundcard.
Pros:bits khz, Great sound quality and connectivity.
Cons:Price?
This is a great external soundcard: allows for recording 8 high resolution channels at the same time!
Pros:bits khz, Great sound quality and connectivity.
Cons:Price?
5. Recording paths
For a long time, I used a cheap noname noncondenser microphone, it was “okayish” for recording, but I quickly realised it had a strong tendency to larsen when jamming. Now I switched to a Shure SM58 for amplyfied singing, and my cheap condensor mic for “acapella” recording.
For live jamming, I usually don’t use any artefacts, so the SM58 goes straight into a hardware amp with speakers.
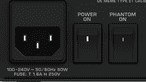
For acapella recording, the condensor mic is connected to the Omega, and usually straight into ardour. Like for the guitarix example earlier, if you record a voice without effects, you can easily post process it (zita-at1, calf,…)One important factor when choosing your mic is “phantom power”: in brief, some mic’s require to receive power to work. So if the device you connect the mic to doesn’t send power and the mic needs phantom power, it just won’t work. This can often explain the case where a mic works on one device, but not on another one. On some devices, you can choose weither the mic inputs receive phantom power or not.
Like the voice, I use different setups to jam or record:
An important note on effects: the order in which you apply the effects on an instrument touchy subject, it is crucial, but it depends.
It is crucial, because the order in which effects are applied change the sound in a considerable way: applying a distortion on a wahwah is completely different from applying a wahwah to a distortion.
It depends, because the important thing is not the order of the pedals, but the sound you want to produce.So yes, there are some basic “rules” regarding the order of the pedals, but everyone has his technique!
I am using a Roland VA3 that I got from ebay, it does what I need: audio output and MIDI IN/OUT.
Either I use it as a Piano, connecting it do the Omega through qjackctl –> ardour and recording/amplifying the audio signal
Or I use it as a midi controller, sending my notes to fluidsynth in midi (like we did with guitarix)
Electronic drums make things much easier, however I only have an accoustic drum. This leaves me with two options for recording it: either the ambient condensor mic, or a set of 7 microphones, dedicated to drum recording.
Most of the time I record the drums as ambience with the condensor mic, as this gives me one track of decent quality, however this doesn’t allow for a lot of processing.
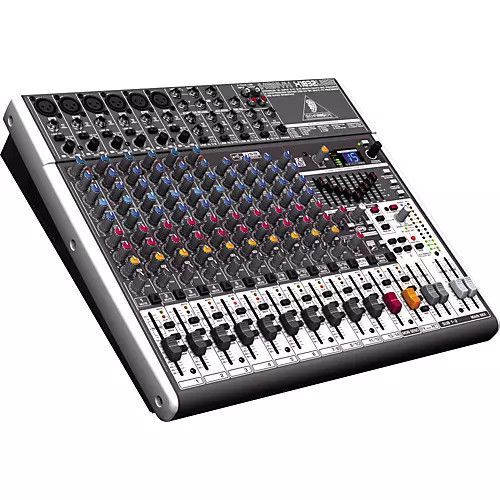
When I want more control, I use a set of 7 microphones, plug them in the Behringer Xenix X1832USB (the only device where I have enough inputs), on the behringer, I can control each volume, then send the audio stram to the Lexicon Omega, which in turn sends 24 bit signal to the computer.
The ideal solution would either be to use an electronic drum, that sends all signals through a multichannel MIDI device (allowing separate postprocessing and the use of different soundbanks), or the use of a better soundmixer table, that sends the signal of the micros through more channels in 24 bit (allowing signal postprocessing – note however that this is unlikely in USB2, it should either be in USB3 ot in FIREWIRE).
Sometimes I don’t want to record my tracks one by one, but just want to record the music that we are playing in the room with friends.
In this case, I use a cheap condenser mic I got from Amazon.de, and plug it into the Omega’s mic1 input. From here I usually send it straight into ardour.
I set the level of output on the Omega depending on the volume we’re playing at, using ardour’s meter to judge if the db are in an acceptable good range.
This guide gave you an almost decent overview of the surface of music creation with Linux. I encourage you to visit the jack site to find more applications that might help you achieve your musical goals! If you still don’t find what you’re looking for with native jack applications, don’t forget you can always patch alsa apps with a2j and j2a!6. Conclusion